How to create a form on HTML and CSS
Follow the steps below to learn how to create a very responsive login form using HTML and CSS. Step1: Create a folder for storing or HTML and CSS files. Step2: Create an index.html file. ; ...

Project: Learn how to create a very responsive login form using HTML and CSS with source code
Learn how to create a very responsive login form using html and css. Here as a newbie or regular web designer who has few knowledge in creating a login form, follow the steps below to learn how to create a login form and download the source code below. Follow steps below:
Table of content
- Features
- Downloadable script includes
- Requirements
- How to download and extract the source code
- How to create the login form (source codes)
- More about html and css
Features
- Hoverable dropdown menu.
- Cursor pointer
- Clean interface
- Easy Documentation
Script Includes
- HTML
- CSS
Requirement
- browser (Chrome, firefox, or any other browser).
- Code text Editor (Visual studio, notepad ++, sublime, other).
How to download and Extract source code
The steps below will show you how to download and extract the html and css files:
- Go to the attached Files below and download the zipped file.
- After download, go to your downloads folder and extract/unzip.
- copy the code into your code editor and edit.
To view the output, Browse the file path( eg. file:///C:/{path}/{path-folder}/index.html) in your browser or double click the html file to open
Editing the Code (How to create the login form)
Follow the steps below to write the code if you do not want to download the zipped script:
- Create a new folder with any prefered name for saving the html files for the code we are writing.
- Now, open your prefered code editor, like visual studio code, sublime, etc.
- Create an index.html file and save in the folder we created above.
- Paste the html code below into the index.html file.
<!DOCTYPE html>
<html lang="en">
<head>
    <meta charset="UTF-8">
    <meta http-equiv="X-UA-Compatible" content="IE=edge">
    <link rel="stylesheet" href="style.css">
    <meta name="viewport" content="width=device-width, initial-scale=1.0">
    <title>Login Form</title>
</head>
<body>
    <Div>
        <h3>Login Form</h3>
        <Form>
            <label for="Uname" >Username</label>
            <input type="text" name="Username" id="Uname" placeholder="Username">

            <label for="pword">Password</label>
            <input type="password" name="Password" id="pword" placeholder="Password">

            <input type="checkbox" id="checkbox" > <span>Remember me</span>
            <input type="submit" value="Login">
        </Form>
    </Div>
</body>
</html>
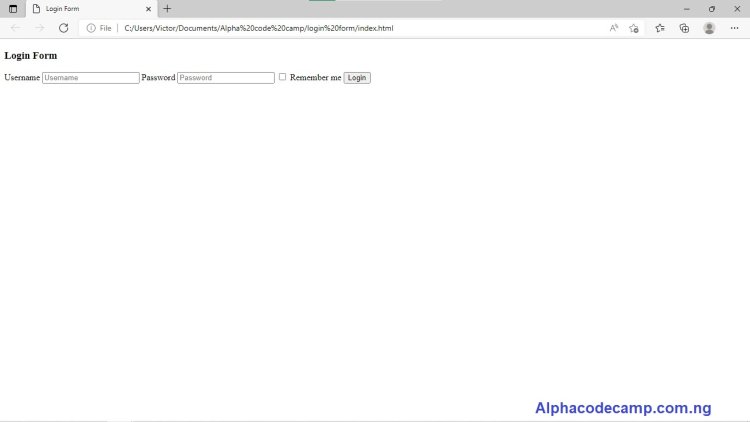
OUTPUT
This is what the output will look like without css. image below:

- Now to style it or give it design.
- Create another file in your editor called Style.css in the same folder and and also paste the below code into it. (This is to style the frontend).
div { width: 50%; border-radius: 6px; background-color: #f2f2f2; padding: 30px; margin: 0 auto; margin-top: 30px; } h3{ color: #000032; text-align: center; font-family: Arial, Helvetica, sans-serif; } label, span{ color: #000032; font-family: Arial, Helvetica, sans-serif; } input[type=text], input[type=password] { width: 100%; padding: 12px 20px; font-size: 13pt; margin: 8px 0; display: inline-block; border: 1px solid #ccc; border-radius: 4px; box-sizing: border-box; } input[type=submit] { color: white; background-color: #000032; cursor: pointer; font-size: 13pt; margin: 8px 0; width: 100%; padding: 14px 20px; border: none; border-radius: 4px; } input[type=submit]:hover { background-color: #000032ce; } - Now run the output on our browser. You will see the styled version of it. you will see the image below:

We used the link rel="stylesheet" href="style.css" to link the html to the css. without this code the css design will not effect. see below:
<link rel="stylesheet" href="style.css">More about HTML and CSS
HTML stands for HyperText Markup Language. It is used for describing web pages, Html tags are used to describe webpage contents like they are used to display text, audio, video, images in a web page.
CSS which stands for Cascading Style sheet. This is used to style/ design the html document, like giving the page its color, shape, display etc. CSS includes different types which are Internal css, External css, Inline css.
Now we have created a login page using HTML and CSS. hope the article was useful, like the post. if you have any question you can ask in the comment section.
Download the source code File below:


