How to install Extensions in Visual Studio Code
Visual studio code extensions help improve your productivity by providing extra functionality, customization's and enhance your development workflow. E.g. Auto Rename Tag, Live Server, Better Comments, Prettier.
Table of content
- What are extensions in Visual Studio Code
- What we can do with extensions.
- How to Search and install an Extension
- Installing Extensions using the VSIX file
- How to disable and enable an extension
- How to uninstall an extension
- 10 Visual studio code extensions
What are extensions in Visual Studio Code
Extensions in Visual Studio Code are add-ons which help provide extra functionality and features not originally installed or found in Vs code. Installing the right extensions gives you the best experience while working on your projects using Visual Studio Code. These Extensions are can be found in the Vs Code Extension marketplace. Extensions can be disabled if don’t want to use them for the main time without uninstalling them. Visual studio Code Extensions allows you change the theme of the Vs Code Environment by installing some themes Like GitHub Theme.
What we can do with extensions.
Using extensions you can do some new and cool stuff like:
- Support a new programming language by installing a new language extension. E.g. Python Extension.
- Change the theme or design of your Visual Studio Code look while. When a new theme is installed the design and color of your codes changes to the theme look.
- With extensions you can add new/custom components in the UI
- Create a live server that will automatically run codes without doing them manually.
- You can display a webpage (HTML, CSS, JS) inside your Vs Code using the in-built web view.
- Support debugging a runtime
How to Search and install an Extension
In other to install an extension, you need to open the Extension marketplace. You can do this by following the steps below:
- Click on the Extension logo at the left side of the screen or Press (Ctrl+Shift+X) on your Keyboard.
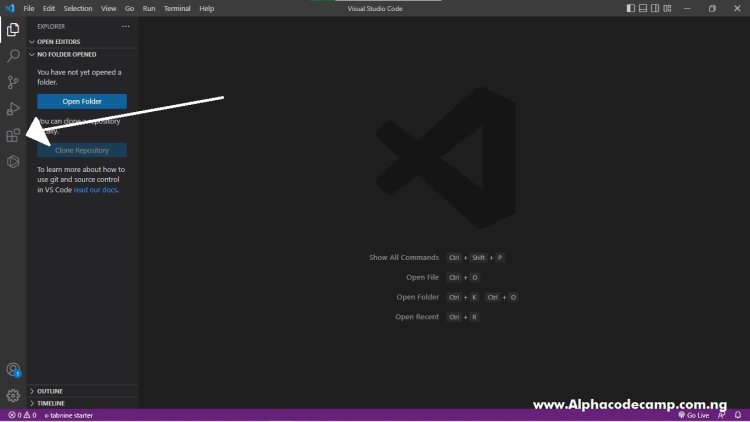
- Then you can search for any extension you wish to install.
- On the recommendation tab, you can also see recommendations for other extensions.
Installing Extensions using the VSIX file
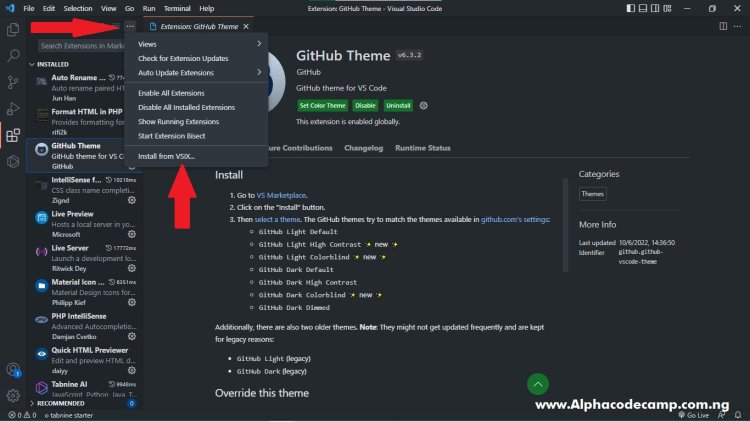
Alternatively, Extensions can also be installed using the VSIX files. When the VSIX files are downloaded, they can be installed manually by clicking on the extension logo then click on the three dots at the top, then click install from VSIX, select the VSIX file and click install.
How to disable or enable an extension
Extensions can be disabled instead of uninstalling them. You might not want an extension to run for a particular reason or for a particular time, they can be disabled and enabled later without you uninstalling them.
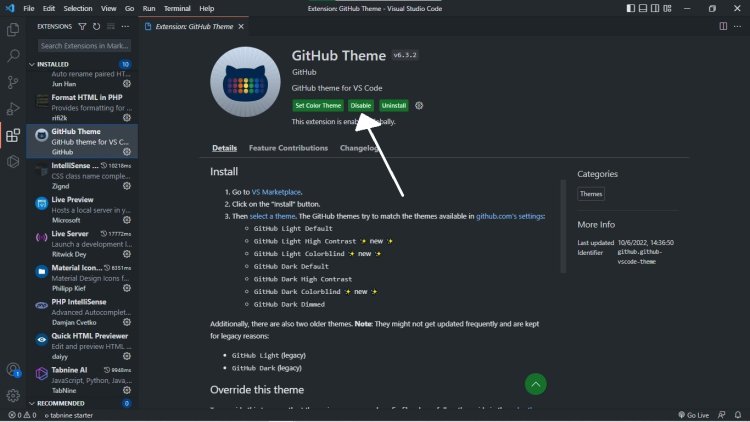
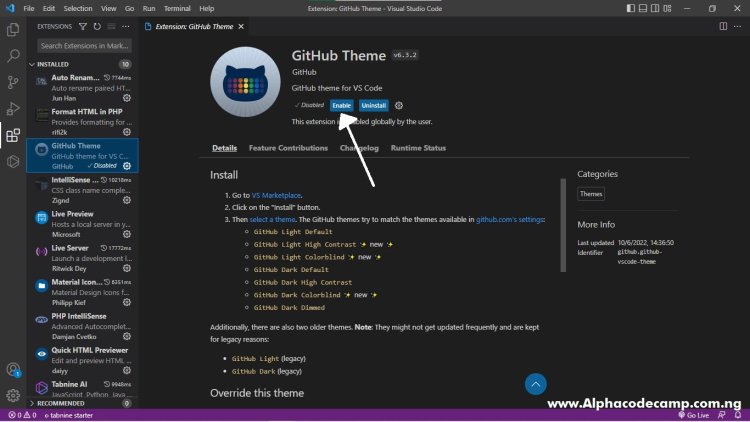
To enable an extension, the extension must have been disabled. To do this, browse the extension you want to enable in the extension marketplace and click on enable.
How to uninstall an extension
Extensions can also be uninstalled of they are not useful anymore. To uninstall them, browse the extension you want to uninstall in the extension marketplace and click on uninstall. In other to use this extension again, you have to re-install them back again.
10 Visual Studio code extensions
- Live Server
- Prettier
- TODO Highlight
- CSS peek
- GitHub Theme
- Auto Rename Tag
- Material icon theme
- Git Lens
- Intellisense
- Setting Sync


