How to create a pay per click platform using php mysql for free
How to create a pay per click website with source code in PHP. Complete pay per click platform script. Follow the guidelines in the article below and also watch the video provided in this article to understand more. A localhost server (xampp) is needed to run this project.

A complete Pay per click platform script with source code in php.
Table of content
- About the complete pay per click platform script with source code in php.
- Features of the complete pay per click platform script with source code in php.
- Script files
- Requirements
- Steps to run this script (installation)
- Screenshots
- Video tutorial
About the complete Pay per click platform script with source code in php
This project complete Pay per click platform script with source code in php is a pay per click content management system whereby registered users can place or share ad codes or referral code from the admin on their websites or to users and earn money if anybody clicks or views the link. This project comes with a powerful admin panel for admins to manage all website activities, website settings, and other website features. You don’t need any knowledge in coding as websites can be customized in the admin panel. This project has a very beautiful responsive design. See features below.
Features of the complete Pay per click platform script with source code in php.
Admin Panel
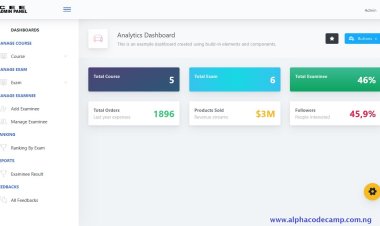
- Dashboard: This page displays the website statistics like total users, total deposits and withdrawals, payment methods, site graph, etc.
- Ref commission: Here you can manage referral commissions, change its settings.
- Membership plan: Here you can manage website membership plan, add new plans.
- Ads: this page show the list of ads created by the admin, you can also add, delete or edit any ads. Ads can be created in links, image banner and others.
- Manage Users: this features;
-
- All users – displays all registered user on the site
- Active users – shows only the active users on the site
- Banned user - displays the banned users on the site
- Login history – shows the list of all users’ login history based on date, OS, browser, etc.
- Email verified – show the list of email verified users.
- Deposit system: this page features;
-
- Automatic gateways: This page shows the list of 21 payment gateways which can be enabled on the site for easy transactions. Here each payment gateway can be enabled or disabled or modified.
- Manual gateways: Here you can add manual payment gateways, and see other manual added payment gateways.
- Pending/ approved deposits
- Successful/ rejected deposits.
- Withdrawal system: Here you can add withdrawal methods for users to withdraw earnings.
- Support ticket: This page shows all support tickets created users for aid. It is grouped various category.
- Reports: Manage all transaction logs and ads view log; you can filter by date or username for easy log search if log reports list is long.
- Language settings: Add new language or edit already added language.
- General settings:
- Website settings: In this page, you can change the website title, currency, symbol, site color and other preference.
- Logo settings: change your website logo and favicon.
- Plug-ins: Here you can add plugins or extensions like captcha, etc to your site.
- Seo configuration: Here you can input your site SEO information for rankings. This page provides you with SEO configurations like Meta keywords, description, and others.
- Change template
- Email configuration
- Sms settings
- Site Page settings
- Site page content editing
- Login system
- Section manager
- Search in admin panel system
- Testimonial system settings
- Plan settings.
User/ visitor side
- Own user dashboard
- Blog page
- FAQS page
- User profile
- Subscriptions methods
- Referral system
- Deposit and withdrawal methods
- 2FA security
- Change site language
- Support page
- Open tickets
- Earn commissions
- Login/registration system
- SEO optimized
- Social media handle
- Contact page
Script Files
- PHP
- Database – MYSQL
- More…
Server Requirements
- PHP 3 higher
- TOKENIZER PHP Extension
- CURL PHP Extension
- GMP PHP Extension
- XML PHP Extension
- PDO_MYSQL PHP Extension
- BCMATH PHP Extension
- FILEINFO PHP Extension
- PDO PHP Extension
- CTYPE PHP Extension
- JSON PHP Extension
Steps to run this script (installation)
A localhost server (XAMPP) should already be installed in your pc before proceeding with the steps below.
(Watch the video below for a smooth installation)
- Click on the download button below this article
- Extract the code.
- Paste the extracted folder in C:/xampp/htdocs
- Run your XAMPP control panel and start Apache and MySql.
Creating a database
- Open any browser
- Go to this url “http://localhost/phpmyadmin/”.
- Click on New
- Input this name “ppc_db” then click on create.
After creating a database (installing)
- Open a new tab and browse the path. E.g. “http://localhost/payperclick/install/”
- Then click on next step
- All the extensions must be present before the next step
- Fill in the installation information and click install
Screenshots


Video tutorial
Watch video for easy installation


